Learn the Top 5 Worm Composting Fears and Their Solutions

What are your fears about vermicomposting? What is holding you back from starting your own worm composting bin today? Chances are, its one of the top 5 fears about vermicomposting that all beginners share. This article will help you claim your worm composting fears and more importantly, identify their solutions so you and your worms can live happily ever after.
1. Worm Escape! Thousands of worms are crawling all over my house!

The number one fear of new and experienced worm farmers is that your worms will stage a mass exodus from your worm bin. Just the thought of thousands of red wiggler worms wriggling around my house makes my skin crawl. The good news is that if you take good care of your worms, this will never happen. The simple truth is that worms can not survive outside of the habitat (the worm bin) you have made for them and they will not bail unless things get really really bad inside the bin. I keep a worm bin under my desk at work and have had zero problems with it. Below you will find the major reasons worms leave their bin and how to avoid it.
- Exploration of brand new worm composting bin. When you first add composting worms to a new worm bin, they will crawl all over the inside of the bin checking it out within the first couple days/nights. Usually they don’t leave the bin during this “settling in” stage but to make sure that they don’t, simply leave a light on in the room with the worms. Worms don’t like the light so they will be encouraged to burrow down in the worm bin bedding.
- Too much water, not enough air. Another reason worms may leave their cozy worm bin is it is too wet inside. The worm bedding needs to be moist but NOT soupy or soggy. Too much water means the excess water fills up all the space in the bedding that is usually filled with air. This lack of air and crawl space for the composting worms could cause them to look for another home outside the worm bin. If your bin is too wet, add some drainage holes or some dry bedding to soak up the extra moisture. Read more on worm bin bedding moisture here: Moisture Level of Worm Bin
- Worm Bin is too hot. Composting worms will leave their bin if it gets extremely hot. Be sure your worm bin stays within the ideal temperature range by keeping it either indoors or in the shade outdoors. For more on managing temperature in your worm bin read: Regulating Temperature in a Worm Bin. Also, be sure not to overfeed your worms with food scraps. A large worm composting bin can turn into a hot compost pile if you add too much food waste too quickly. For more on how to feed your worms read: Feeding Your Composting Worms
If you are still worried about your worms escaping into your house, don’t give up on vermicomposting, just start an outdoor worm bin!
2. Smell. Do worm composting bins smell bad? Answer: They shouldn’t
Rotting food scraps? Worm poop? Doesn’t it stink? As a worm farmer you will be asked these questions often. The answer is: worm bins should never stink. A bad smell is an indicator that something has gone wrong and needs to be fixed.
- Too much water, anaerobic decomposition. There are generally two types of decomposition: aerobic (with oxygen) and anaerobic (without oxygen). We always prefer aerobic (with oxygen) decomposition. If you have ever bagged grass clippings, tied them in a plastic bag, left them in the sun for a while, then opened the bag, you have experienced smelly anaerobic decomposition. To ensure your worm composting bin doesn’t go anaerobic, be sure there isn’t too much water in your bin. Too much water forces the air out of the bedding.
- Too much food scraps. Another reason your worm bin may stink is you have added too much food scraps for your worms to eat. If the composting worms can’t eat it in time, the food scraps will decompose on their own which can cause a foul odor.
- Food scraps on top of bedding. Be sure to always bury your food scraps under the worm bin bedding to ensure they won’t stink.
3. The ickiness factor. Touching one worm is fine, but holding a handful of composting worms?! You have got to be kidding me.

Even though many people are sold on the benefits of worm composting, they struggle with the ickiness factor of worm farming. Some people see worms as yucky, slimy, crawly, and gross. My advice is to start slow. You don’t have to hold a handful of worms on day one (unless you want to!). You don’t even need to hold any worms in your hand until you are ready. If worms freak you out a little, use latex or rubber gloves and a small digging fork when you work with your worms.
4. Rats! Won’t rats be attracted to the food scraps?
Nobody wants rats hanging around outside their house. Below are a few ways to ensure that rats don’t see your worm composting bin as an all night buffet.
- Keep the worm bin inside. This is the simplest solution.
- Bury your food scraps! Be sure to always bury all food scraps under the worm bin bedding. Food scraps tossed on top of the bedding can cause an odor which can attract unwanted rodents.

- Use a sealable outdoor worm bin. Whether you make your own worm composting container or purchase one, you can be sure that your worm bin has a lid that seals it off from rodents. I have used cinder blocks to block the harvest access door in a homemade continuous flow through worm bin. NOTE: If you manage all other aspects of worm farming correctly you do not need to seal off your bin from rodents. Many people have success using in-ground worm composting systems.
5. I don’t want any other bugs in my worm bin and I really don’t want any maggots!
If you keep your worm composting bin outdoors, you will soon find that your worm bin is host to lots of other types of bugs as well as your worms. In my worm bin I have found: rolly pollys (sow bugs), ants, centipedes, millipedes, earwigs, pot worms (very small white worms), slugs, and more. These other bugs won’t hurt your worms and are usually a sign of a healthy worm bin. Some, like ants, usually won’t hurt the worms but should be dealt with for our comfort.
- Ants. knock on wood, I have never had fire ants in any of my worm bins. I have had lots of sugar ants, especially in my larger outdoor worm composting systems. An ant infestation is usually a sign that your worm bin bedding is too dry. Add some water with a spray bottle or watering can. If that doesn’t work try sprinkling ground cinnamon on top wherever the ants are. Ants hate cinnamon. Don’t use a poison to get rid of ants because that will hurt your worms.

Composting Worms and Black Soldier Fly Larvae - Black Soldier Fly Larvae. See picture right. People often freak out when they first find Soldier Fly Larvae in their worm bin because they look like maggots. They are similar to common house fly maggots in that they are the larvae stage of a type of fly, however they eat any type of food scraps not primarily meat. Many people intentionally use BSF (black soldier fly) larvae to compost their food scraps. I have even set up black soldier fly composters on top of my chicken coop so that the adult larvae crawl out (when they are ready to turn into a fly) and drop right down into the chicken coop. My chickens love eating them and have learned to wait under the BSF composters. A free protein source! Black soldier fly are found naturally in most parts of the world and will most likely find your outdoor worm bin in the summer. They will not hurt your composting worms and can easily coexist in the same bin.
-

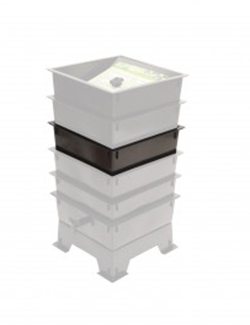
Can O Worms Worm Composter Keep your worm bin indoors. If you are worried about other critters finding your worm bin, try keeping the worm bin inside from the beginning. Rolly pollys and a few other harmless bugs will still find your bin but you will be sure to keep out ants and black soldier fly larvae.
Hopefully this article calmed some of your fears about vermicomposting. You can do it! For more info and pictures of the different types of bugs that you may find in your worm composting bin, check this out: Other Critters in my Worm Bin.
If you found this article helpful, please share it with a friend. If you are ready to get started with worm composting read: Start Here


